How Do You Install Laminate Countertops?
Laminate countertops are a popular choice for homeowners looking for a cost-effective and visually appealing kitchen upgrade. With an extensive range of design options, laminate countertops offer versatility and durability without breaking the bank. If you are planning to replace your counters yourself, the following steps explain how to install new laminate countertops. The process is easy enough for somewhat experienced DIYers and only requires a few tools.
What Are Laminate Countertops?
Laminate kitchen countertops are constructed from several layers of paper infused with resin and compressed under high pressure. The top layer showcases various patterns, colors, and textures, effectively mimicking the appearance of natural stone, wood, or other materials.
Why Choose Laminate Countertops?
From classic granite and marble imitations to contemporary solid colors, laminate countertops offer endless design choices. This versatility allows homeowners to match their kitchen decor and personal style seamlessly.
Compared to their natural stone counterparts, laminate countertops are considerably more affordable. Homeowners on a tight budget can achieve a stunning kitchen renovation without compromising on quality.
Steps to Installing Laminate Countertops
To begin the installation process, gather the following tools and materials:
- Measuring tape
- Drill or driver
- Utility knife
- Putty knife
- Pry bar
- Rubber mallet
- Level, the longer the better
- Joint compound or drywall mud
- Fiberglass joint or drywall tape
- Laminate countertop sheets
- Circular saw or jigsaw with a fine-tooth blade
- Straight Edge
- Carpenter’s square or speed square
- Sandpaper
- Contact or construction adhesive
- Screws
- Router
- Caulk
- Caulk gun
1. Measure Your Countertop
Before buying the laminate countertop, make sure to measure your area accurately so that you can purchase the right size. Start by drawing a rough sketch of your counters.
Then use a tape measure to get an accurate measurement on the counters. Always measure from wall to wall, accounting for the section under the backsplash. If your countertop turns, measure to the longest sit of that section.
Don’t forget to measure the length of your backsplash as well.
When you go to buy new counters, add an extra inch or two per section. While you will need to away the excess, this ensures you get the perfect fit. It also accounts for errors while measuring. If you did under-measure slightly, you will have more than enough material for the perfect fit.
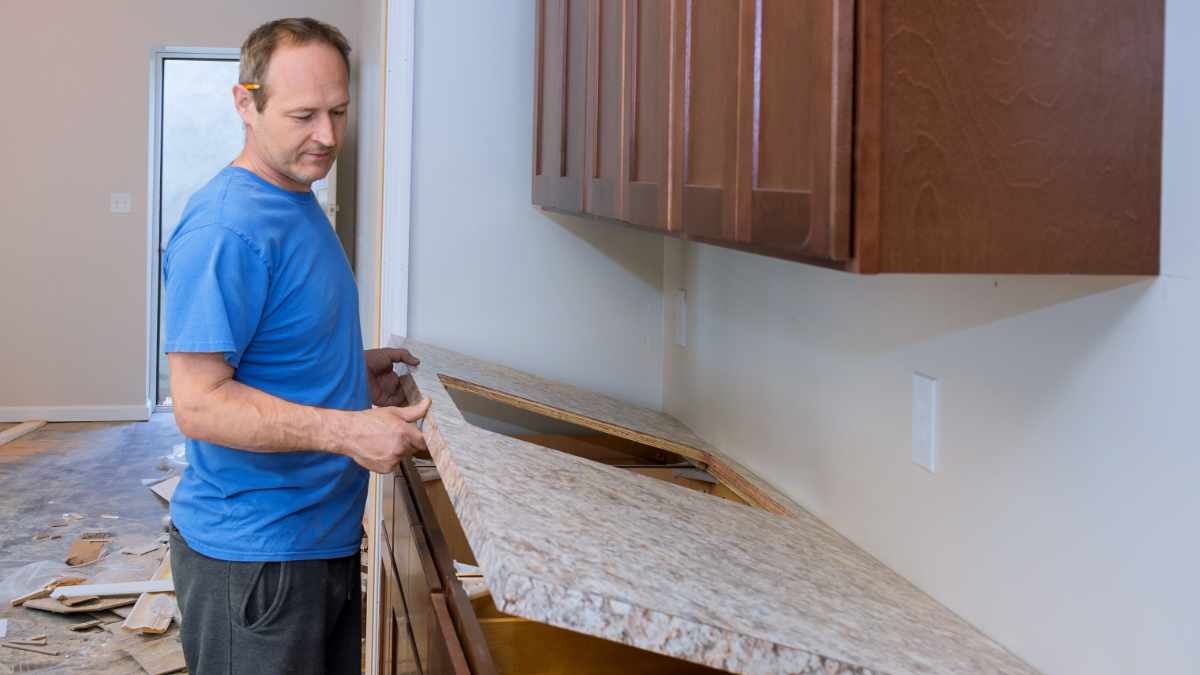
2. Remove Your Old Countertops
Next, you need to remove your existing countertops. Work carefully if you plan to reuse your existing counters.
Start by emptying the cabinets and removing the cabinet drawers below the countertops. If possible, remove the cabinet doors as well. This will make accessing the area under the counters.
Next, take out the sink. Turn off the water and drain the fact, then disconnect the water lines and the drain pipes.
For drop-in sinks, push the sink upward from inside the cabinet and have someone lift it out. For under-mount sinks, have someone hold it in place while you remove the screws. If you plan to reuse the same sink, store it safely while you install the new laminate counters.
With the sink out of the way, use a utility knife to score the caulk around the backsplash. Then use a pry bar to separate them from the wall. If you have a hard time getting the pry bar in between the backsplash and wall, slide a wide-blade putty knife in the gap. Then use the pry bar.
Next, check inside the cabinets for screws and remove them. However, some counter ops are held in place with construction adhesive. Use a rubber mallet to knock the counters loose.
Lastly, carefully lift the counters off the base cabinets. Depending on the size, you may need help to remove them.
3. Clean the Cabinets and Check for Level
With your old countertops out of the way, you should clean the cabinet bases and check that the tops are level.
Start by scrubbing the cabinets with a soft cloth, liquid dish soap, and warm water. Wash the cabinet faces as well as the inside of the cabinet boxes.
Cabinets can shift, shrink, or swell with age, resulting in an unlevel surface. To make sure the new counters are level, check the cabinet tops with a long level.
If the cabinets are not level, you can use shims to adjust the counter surface when you are installing.
4. Make Wall Repairs
You may need to make wall repairs. Removing backsplashes and counters can gouge or damage the wall surface.
Start by sanding down old adhesive or caulk. Then fill small gaps or cracks with joint compound. Use fiberglass drywall tape and drywall mud to seal larger cracks.
Let drywall mud dry overnight, then sand it smooth. If necessary, apply another coat of joint compound to make a smooth surface.
5. Measure and Cut the Laminate Sheets
Now remeasure the length of the countertops so you can make accurate measurements. Again, if there are turns or bends in your counters, measure the longest edge.
Remember, this is the most important step of the process, so take your time.
Measure the length of the cabinet tops twice to ensure you get the right length. Then do the same on the countertops to ensure they are the correct length. Mark the length on the underside of the piece of laminate.
Then use a circular saw to cut the cabinets to length. Use a fine-toothed saw blade with at least a 40-tooth count. While not necessary, carbide tip blades last longer. Take your time while cutting so you have clean and precise cuts.
To avoid chipping or splintering during cutting, apply masking tape along the cutting lines. This will help protect the laminate surface and ensure smooth edges.
If you have a turn or bend, use a compound miter saw to get the right angle. You can use a speed square to accurately measure the angle. Draw the cut line on the underside of the laminate sheet with a straight edge. Then cut the sheet as outlined above.
If you have a sink in the countertop, measure the placement and cut a whole for it. Use a drill or driver to cut a whole in the counter. Then use a skill saw or jigsaw to cut out the hole for the sink.
6. Dry Fit the Countertops
Once you make the cuts, dry-fit the laminate counters to make sure everything looks good. Even with precise cuts, you may find that you need to do a little sanding to get a perfect fit.
This can include lightly sanding the cuts or even the wall. As with the cuts, remember to take your time and check your work frequently.
Once you have the fit right, check the countertops for level. Test several spots along the counter, checking both the length of the counter and from the wall to the front of the cabinets. If the cabinet is not level, you will need to use shims to fix the issue.
7. Attach the Countertop
You should attach the laminate countertop using screws and construction adhesive. Make sure the screws are the right length. Otherwise, you could poke through the laminate surface. Also, use a construction adhesive that is meant for laminate material.
Attach the laminate countertops through the cabinet braces. Start by applying a small amount of adhesive to the cabinet braces. Then lay the countertops in place and check for level. Add shims or a thin piece of wood if necessary.
Next, drill a small pilot hole through the braces and into the laminate material. Then insert the screw through the brace and into the counter. The screws should be tight, but avoid over-tightening them.
Not only can that strip the screws, but it can put pressure on the cabinet braces. While rare, this could cause them to warp or even crack.
8. Install the Sink
With the laminate counter installed, you can now install the sink. The exact method depends on the style of your sink.
Drop-in sinks go in from above the countertop and lay on the laminate surface. Roll out a 1-inch diameter snake of plumber’s putty. Then lay it completely around the sink opening. Then slowly lay the sink into place. Wipe away any excess putty.
Undermount sinks attach to the underside of the laminate material. Ring the sink lip with plumbers putty. Then has someone hold it in place while you screw it into the counter. Be careful to use screws that will not go through the counter material.
Dual mount and farmhouse sinks require special installation depending on their size and style. Review the instructions that came with your sink for the proper installation method.
9. Finish the Countertop Edge
Most laminate materials come with a finished edge in a variety of shapes and styles. However, you want want to create a custom edge in some cases.
If you choose to go this route, you will need at least a finishing strip. Many edging strips come with an adhesive back to make installation easy. Just line up the strip, peel back the tape, and stick it to the edge of the laminate counter sheet.
Alternatively, you can create a custom beveled edge with a router. Use a router bit meant for wood or laminate material. Work slowly, using consistent pressure, to make smooth, clean cuts.
Once you finish with the router, wipe down the edge with a damp cloth to remove any dust or debris. Then apply the finishing edge to the counter.
Depending on the type of bevel you choose, it can be tricky to get the finishing strip to stick. Work slowly, using gentle pressure to get the strip to stick to the edge.
In either case, use a utility knife to trim away any excess finishing material for a clean, professional look.
10. Install the Backsplash
After installing the countertops, you can measure and cut the backsplash. Follow the same procedure outlined above.
Measure the wall and the laminate material twice each, then mark the inside of the backsplash piece. Tape the material to prevent chipping or scratching, then make the cut with a circular saw and a fine-toothed blade.
With the pieces cut, dry-fit them in place. Again, lightly sand the cuts if they don’t fit together snuggly.
Finally, apply a thin layer of construction or contact adhesive to the backsplash and press it into place. Repeat this for each section of the backsplash.
11. Caulk the Laminate Countertops and Backsplashes
Finally, apply a thin bead of caulk around the backsplashes and along the seam of the countertop. The caulk will keep water from dripping into the cabinets and prevent damage.
Start in one of the corners and run a bead out to the edge of the counters. Then repeat the process until all the seams are sealed.
For the best results, use constant pressure as you move the caulk gun along the seam.
Do you want new laminate countertops, but worried you might not have the time, tools, or skill to get the job done right? Let Remodeling.com connect you with a qualified local pro today. We have it easy to get quotes from multiple kitchen remodel companies in your area.