How Do You Change a Bathroom Faucet?
Are you tired of that old or leaky bathroom faucet? Are you looking to make a cosmetic upgrade? Replacing a bathroom faucet is a relatively straightforward process that only takes a few tools and some basic DIY skills. If you are looking to make a change, the following steps explain how to change a bathroom faucet.
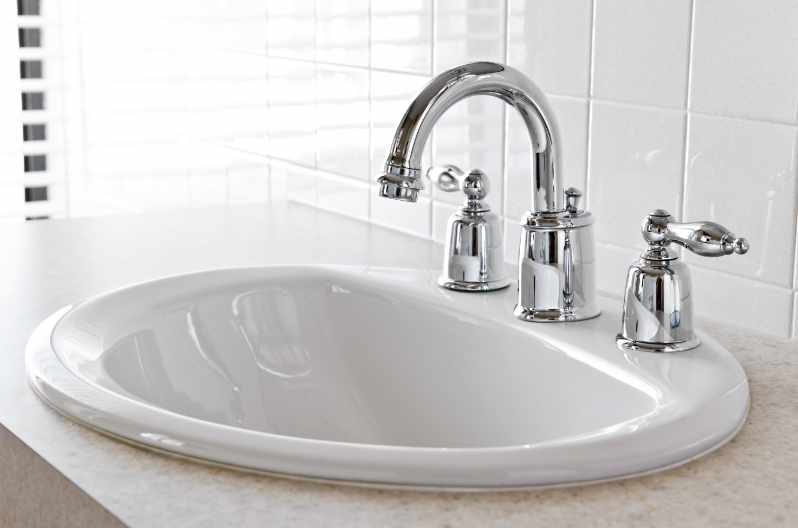
How To Change a Bathroom Faucet
Changing a bathroom faucet is a simple DIY project. Here is a step-by-step guide to help you through the process.
1. Gather Supplies
Before you start, make sure you have the new bathroom faucet and all the necessary tools and materials ready. A bucket or a few towels will help prevent a mess inside the cabinet when you disconnect the water lines.
You will need an adjustable wrench to disconnect the water lines and disassemble the existing faucet.
Depending on the style of your current faucet, you may need a basin wrench to release the bolts. If this is the case, you may want a long screwdriver to make removing the bolts easier.
You may need a utility knife to cut away the caulk around the faucet.
When installing the new faucet, you will need plumber’s tape, also known as Teflon tape, so the connections for a water-tight seal.
Depending on the style of the faucet and to a certain degree your personal preference, you may need silicone caulk. Most modern faucets come with a silicone or rubber gasket that seals the faucet with the sink or counter. But a small bead of caulk will completely seal them and prevent leaks.
2. Turn Off the Water
Next, you need to shut off the water. In most cases, you will have shut off valves under the sink. There are separate valves for the hot and cold water supplies.
Turn the valves clockwise to shut them off. If you do not have valves under the sink, look for your main shut-off valve in the basement or utility room.
3. Drain the Faucet
With the water valves off, turn on the faucet to drain out the remaining water in the lines. If your faucet has a single handle or knob, make sure you let it run on cold and then move it to hot to completely drain it.
4. Disconnect the Supply Lines
Then use an adjustable wrench to loosen and disconnect the water supply lines. Even after draining the bathroom faucet, the lines may still have a little water inside. Place a bucket or towels under the sink to catch any water that may still come out.
5. Remove the Old Faucet
Every faucet is a little different, but most are attached to either the sink basin or the countertop with some type of nut. Use an adjustable wrench to loose the nuts.
If you are working in a tight space, a basin wrench might make the process easier. It is a special type of wrench that slides over the faucet shanks and makes it easier to remove the bolts.
You may need to use a screwdriver as a lever to get enough torque to unscrew the nuts with the basin wrench.
With the nuts removed, you should be able to pull the faucet out. However, you may need to cut away the caulk first. Use a sharp utility knife, being careful not to scratch the sink or counter.
6. Clean the Area
Remove any residue or debris left by the old bathroom faucet. Clean the surface thoroughly to prepare it for the new faucet.
You can scrape away excess caulk with a utility knife. Then scrub the surface with soap and water. If necessary, you use baking soda and vinegar to remove stubborn stains or mineral deposits.
Once clean, wipe the area clean with a dry towel.
7. Install the New Bathroom Faucet
Follow the manufacturer’s instructions for installing your new faucet. For the most part, this is very straightforward. Insert the new faucet into the mounting holes, then secure it in place with the provided nuts.
Use either an adjustable wrench or a basin wrench to lock the faucet in place. The nuts should be tight, but avoid using too much effort. Overtightening them can strip the threads or even put unnecessary pressure on the faucet or mount.
8. Attach Supply Lines
Once the bathroom faucet is installed, connect the water supply lines.
Wrap the faucet shanks in Teflon or plumber’s, then screw on the water supply lines. The plumber’s tape ensures a watertight seal and prevents leaks.
Tighten them down with an adjustable wrench, but avoid over-tightening. This can strip the threads and lead to leaks.
9. Test the Faucet
With the bucket or towels still under the sink, test the faucet for leaks. Open the knobs slowly and check for leaks from around the faucet shanks. If water tips from around the supply lines, tighten them with your adjustable wrench.
10. Seal the Faucet (Optional)
If you want to prevent water from seeping underneath the faucet, you can apply a small amount of clear silicone caulk around the base of the faucet where it meets the sink or countertop.
This is a completely optional step, but it does offer additional protection against water damage from splashes and messes in the bathroom.
Frequently Asked Questions About Replacing a Bathroom Faucet
How Long Does It Take To Change a Bathroom Faucet?
Typically, replacing a bathroom faucet takes anywhere from one to three hours. The amount of time depends on your skill level and how difficult it is to remove and replace the faucet.
Is Changing a Bathroom Faucet a Difficult DIY Project?
Changing a bathroom faucet is a basic DIY project, especially if you are comfortable with basic plumbing tasks. However, it can be much more difficult if you are inexperienced with plumbing or you do not have the right tools.
Can I Reuse the Supply Lines From the Old Faucet?
While you can reuse the existing supply lines, they usually only cost $10 each. You might as well replace them when you install a new bathroom faucet. This ensures they will not leak or crack.
Do I Need To Hire a Professional Plumber To Change a Faucet?
If you are comfortable with basic plumbing tasks and have the necessary tools, you can change a faucet yourself. However, it is best to hire a professional plumber if you are unfamiliar with plumbing upgrades or you do not have the right tools.
What Do I Do if There’s Water Dripping From the Supply Line Connections?
If there is water dripping from the supply lines, tighten the connections with an adjustable wrench. If this does not fix the problem, you will need to shut off the water, drain the faucet, and disconnect the water lines. Then a new layer of Teflon tape and reconnect the water lines.
Do I Need To Caulk Around the Base of the New Faucet?
Caulking around the base of the faucet is optional but can help prevent water from seeping under the sink. Use clear silicone caulk and apply it neatly.
Can I Replace a Two-Handle Faucet With a Single-Handle Faucet?
Yes, you can switch from a two-handle faucet to a single-handle one, but you will need to cover the extra holes in the sink. Some single-handle faucets come with a baseplate that can cover these holes, but you can also buy after-market cover plates.
If you are worried about replacing the faucet in your bathroom, Remodeling.com can help. We are the fast and free way to get multiple quotes from local plumbing pros. Just enter your zip code and answer a few simple questions to get started today.