How To Replace a Garbage Disposal
Is it time to replace the garbage disposal on your kitchen sink? Whether your existing one is just not working or you want to upgrade to a new, more powerful model, garbage disposal replacement is an easy DIY task that only takes an hour or two. The following steps explain how to replace a garbage disposal quickly and safely.
How Do You Replace a Garbage Disposal?
Here are the basic steps to garbage disposal replacement. If you are uncomfortable with any of these steps or do not have the required tools, contact a professional plumber for assistance.
1. Gather Tools and Supplies
Start by gathering the necessary tools and supplies. You will need an adjustable wrench, although a socket sight might also be helpful. A bucket and a towel will help prevent a mess when removing the old disposal.
In some cases, you will need both slotted and Philips head screwdrivers for the electrical wiring. You may need also need other electrical supplies like wire caps and electrical tape.
A putty knife or scrapper will help clean up the old installation. For the new garbage disposal installation, you will need plumbers putty. Also, eye protection is recommended.
You might need to turn off the power, so a flashlight or work lamp with a long extension cord is also helpful.
If your sink cabinet is full, it is also helpful to clear it out before starting. With the cabinet empty, lay the towel down to prevent damage.
2. Shut Off the Power
Next, shut off the power to the disposal outlet. Some garbage disposals have a dedicated breaker, but others will require you to turn off the power to the kitchen.
However, you can skip this step if both your current and replacement garbage disposal use standard electrical plugs.
3. Disconnect the Drain Line
With both a towel and a bucket under the disposal, loosen the compression coupling on the drain line. Remove the gasket and locking nut completely and disconnect the discharge pipe from the drain line.
4. Remove It From the Mounting Assembly
With the drain line disconnected, you can remove the disposal from the mounting assembly. Most units twist out, but some older models have screws or bolts that connect them to the mount.
Try turning it counterclockwise before removing any bolts or screws. If it does not come free, look for a locking screw. These screws press into the mounting assembly for added security.
Some models have one locking screw, while others will use several. Loosening these screws should allow the disposal to twist it free.
As a last resort, you can unbolt the assembly itself to replace the garbage disposal.
5. Disconnect the Electrical Wires
Most garbage disposals use a plug, but some are hardwired into an electrical junction box. If your unit has a plug, unplug it and skip ahead to step 6.
If your disposal has wires coming out of a plastic or metal electrical box under the sink, you will need to disconnect them first. Make sure the power is off before continuing.
Lay the disposal down on the towel inside the cabinet and unscrew the electrical panel. It is usually found at the bottom of the unit or near the bottom along one of the sides.
Remove the screws on the panel to uncover the wires. Then unscrew each wire. If the replacement disposal is also hardwired, skip ahead to step 6.
If the new model has a plug, you need to cap these wires. Twist wire caps onto each wire, then use electrical tape to secure them in place. Roll the wire up and secure it inside the electrical junction box.
If you are uncomfortable with these steps, contact a qualified electrician.
6. Remove the Mounting Assembly
Next, remove the disposal mounting assembly. Use an adjustable wrench or a socket set to unscrew the bolts. Then remove the mounting bracket, gasket, washer, and any other pieces underneath the sink.
7. Replace the Sink Flange
Push the sink flange up from under the sink, then pull it out from above. The flange is the metal drain piece that sets inside the sink.
With the flange out of the way, use the putty knife to scrap out any remaining plumbers putty. Then wash the opening with warm, soapy water and dry it with a clean towel.
Then install the new sink flange. Using more plumbers putty than you think you need, roll it out a log and wrap it around the flange.
Press the flange into the sink opening, allowing the putty to fill the gaps. Check that it is even and level in the sink before attaching the locking nut and mounting assembly underneath the sink.
Tighten the bolts slowly, moving from bolt to bolt until they are all firmly in place. This will help keep the flange and garbage disposal level in the sink.
Wipe away any excess putty with a damp cloth.
8. Connect New Electrical Wires
If your replacement garbage disposal has hardwired electrical wires, open the panel and connect them as shown in your installation diagram. Contact an electrician if you are unsure how to safely connect the wiring.
If your new disposal has a plug, skip this step.
9. Install the Discharge Pipe
Also called the discharge tube, some replacement disposals come with the pipe preinstalled. The discharge pipe is the right-angle pipe that connects the disposal to the drain pipe. If the pipe is already installed, skip this step.
Otherwise, screw the discharge tube in place using the provided screws or bolts. Follow the manufacturer’s instructions for the best results.
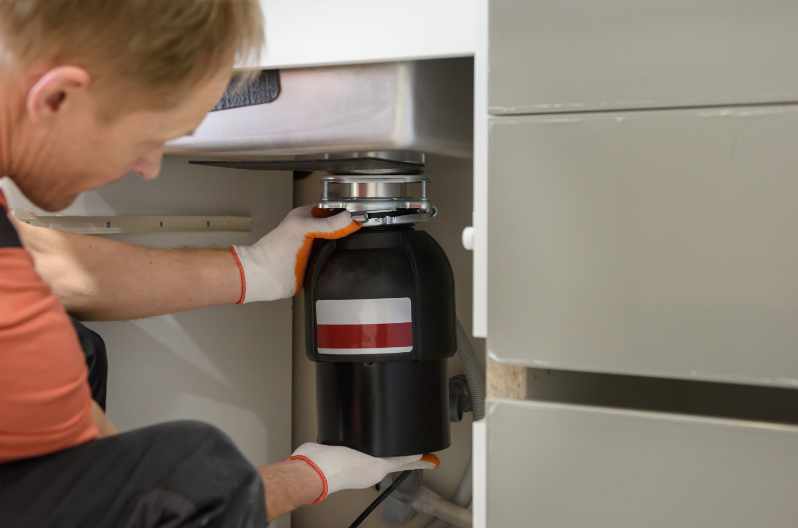
10. Hang the Disposal
Hang the disposal on the mount and test for placement. Check that the discharge pipe and drain line match up. If they do not, either reseat the disposal in the mount or adjust the mount until they do. Once the pipes line up, tighten down the locking screws to keep the disposal firmly in place.
11. Connect the Drain Line
Then slip the drain line gasket and coupling over the discharge pipe. Connect the drain line and tighten the coupling for a water-tight seal.
However, avoid overtightening the connection, as this can crack the gasket or strip the threads on the coupling nut. Ideally, you want it hand-tight and do not need to use tools or excessive force.
12. Test for Leaks
Finally, pour a cup of water down the drain to check for leaks. Look for drips along the sink flange, the discharge pipe, and the drain line. If you have leaks, tighten the connections until they stop.
If your model uses an electrical plug, you can plug it in at this time. Then turn the power back on. You may need to press the reset button if you have a GFCI outlet.