How Do You Retile a Shower?
Are your shower tiles falling off the wall? Missing tiles will cause more tiles to fall off and eventually lead to mold and water damage problems. Retiling a shower can be a challenging project. However, you can achieve professional results with the right tools, quality materials, and a little patience. Whether you are looking to replace all the tiles or just a few broke or loose ones, these steps explain how to retile a shower.
What Are the Steps To Retile a Shower
Shower retiling is a great way to update your home without the expense and commitment of a full bathroom remodel. While shower retiling is a straightforward home improvement project, it does take time and some specialized tools.
At the very least, you will need a chisel, a large putty knife or grout scraper, a tile trowel, and a grout trowel. A rotary tool with a diamond bit and an electric hand sander are also recommended.
If you need to repair or replace sections of the wall, you will also need a drywall saw or utility knife, joint compound, and fiberglass drywall tape. For large holes, you may need a new backer board or sheet of drywall.
It is important to follow the manufacturer’s instructions for the adhesive, grout, and any other materials you are using. Contact a professional bathroom remodeler or tile contractor if you are unsure about any aspect of the process.
Here are the general steps for retiling a shower:
1. Prepare the Shower for Retiling
Remove the old tiles by chipping them away with either a chisel or a rotary tool with a diamond-tipped bit. Depending on your shower, you may also need to remove shower knobs and handles to make working easier.
With the tiles out of the way, scrape away grout and adhesive with a large putty knife. Use a hand sander to knock down any stubborn sections of grout.
If necessary, repair damage to the shower walls with joint compound. For large cracks or holes, cut out sections of the wall and replace them with new moisture-resistant drywall. Seal the seams with fiberglass drywall tape and joint compound, then sand them smoothly once dry.
Finally, use a shop vac to remove any dust or debris as possible. Even a fine powder on the wall surface can make retiling more difficult.
If you are only replacing a few tiles, carefully pry them out with a chisel. Then scrape away the existing grout and adhesive, being careful not to damage the other tiles nearby.
2. Measure and Cut the New Tiles
Measure the shower walls to determine how many tiles you need. Mark where each tile should go, noting how many cuts you need to make. While a square grid or straight tile lines are most common, you can create diamond shapes, tile mosaics, complex designs, and other intricate patterns if you choose.
Once you know the layout, use a wet saw to cut the tiles to size. You will also need to cut tiles so they fit around plumbing fixtures or other protrusions in the shower.
You can make individual cuts while you are installing the tile, but this can slow down the process. Having all the tiles ready from the start streamlines the process and prevents delays.
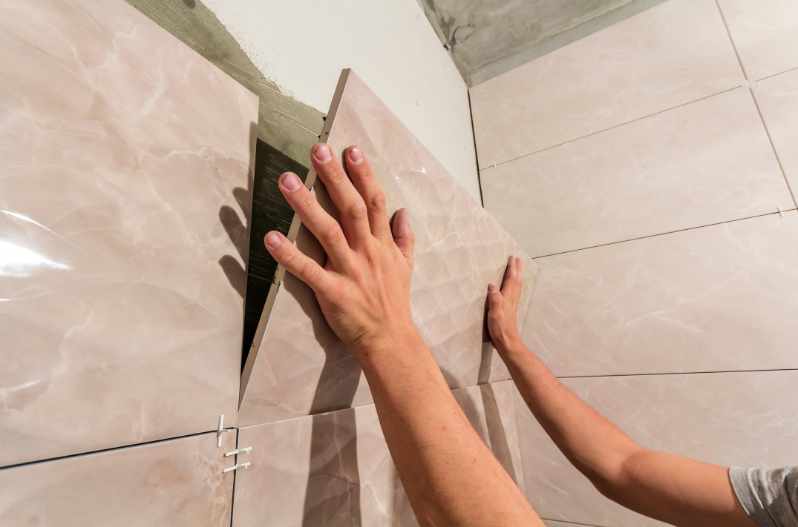
3. Install the Tiles
Spread a layer of tile adhesive on the backer board with a notched trowel, keeping it as thin and uniform as possible. You need a specific adhesive for different types of tile, so follow the directions for the product you are using.
Starting in the center, start pressing tiles into the glue and work your way out to the edge. Use tile spacers to ensure that each tile is evenly spaced and aligned.
Continue until the entire shower is tiled, working slowly to get straight lines and crisp edges. Allow the adhesive to dry per the manufactures recommendations before grouting.
4. Grout the Tiles
Mix the grout according to the manufacturer’s instructions, then use a rubber grout float to spread it into the gaps between the tiles.
A grout float is a type of trowel that has a non-porous rubber pad that resists sticking to the grout material. It makes spreading grout over the tile easier.
Then wipe off the excess grout with a damp sponge or cloth, following the directions for your product. Most tile grouts recommend using a slightly damp cloth and wiping away either immediately or after a few minutes of contact.
Allow the grout to dry for several hours or even overnight.
5. Seal the Grout
To protect the grout line and make them last longer, you need to apply a sealer. There are several products available, but they basically work the same.
Apply the grout sealer using a brush, roller, or sponge. Follow the instructions on the sealer for the best application method.
Wait for the grout sealant to cure completely before using your shower. See the directions for curing times and details.
6. Finish the Shower
Finally, reinstall any fixtures or accessories, such as the showerhead, soap dish, or towel bar.