How To Remove Kitchen Countertops
New counters are a great and affordable way to upgrade your kitchen. But that does mean you need to remove your existing counters first. While it does take some effort, safely removing your counters is actually an easy task that only takes a few tools. From disconnecting the plumbing to prying out the counter, the following steps explain how to remove kitchen counter tops.
How Do You Remove Kitchen Counters?
While it is easier to remove laminate countertops, the process is the same regardless of the countertop material involved.
1. Gather Tools and Protective Gear
Before you can remove or replace your countertops, you should gather the right materials and tools. You will need a sharp utility knife or caulk removal tool to cut away the caulk along the backsplash. A 3″ to 4″ paint scraper or putty knife is also helpful.
You will need at least one adjustable wrench. Depending on the type of faucet you have, you may need a specialized faucet removal tool.
You will also need a screwdriver or a power drill or driver to remove the screws. To get the countertop off of the countertops, you will need a pry bar and either a hammer or a mallet.
For your protection, you should also have work gloves and protective eyewear. Ideally, you should wear long sleeves, pants, and work boots. Several large trash bags will make cleanup easier as well.
Lastly, removing countertops is a job for at least two people. For large sections of counters or heavy quartz or granite countertops, you might want more than two people.
2. Clear Off the Countertops and Empty Cabinets
After getting the supplies together, clear off your countertops. Then remove the drawers from the cabinets and set them aside. While not absolutely necessary, emptying out the cabinets will make the process easier. It also limits the chances of ruining pots and pans, appliances, or food.
Ideally, move items to another room to keep them dust free. But if you need to keep them in the kitchen, cover them with a sheet. This way you don’t need to wash everything once you are finished.
3. Disconnect the Plumbing and Remove the Sink
Next, you need to shut off the water and disconnect the plumbing. If you have a water shut-off under the sink, use that. Otherwise, turn off the water at the main house shutoff.
With the water off, run the faucet to drain the pipes. This will prevent a mess when you disconnect the plumbing.
Unscrew the water lines, then use a wrench or faucet removal tool to remove the faucet bolts. Remove the faucet carefully and set it aside if you plan to reuse it.
Disassemble the drain pipes and remove the garbage disposal. Then find the screws that hold the sink in place. If you have an under-mount sink, have someone hold it in place while you carefully unscrew it.
4. Cut Out the Existing Caulk
You are finally ready to start the removal process. Take the utility knife and carefully cut away the caulk that seals the backsplash to the counters.
Keep the blade flush with the backsplash and cut slowly down the length of the counter. Then repeat the process with the blade flush with the countertops.
The two cuts will help make removing the caulk easier. If the caulk still sticks, use a putty knife to scrap it off the surface. Alternatively, you can use a caulk removal tool to do all the cutting.
5. Pry Out the Backsplash
If you have a traditional countertop-style backsplash, you need to pry that out before you can remove the counters. Use the utility knife to score the paint along the wall, then use the putty knife to open a small gap.
Carefully wedge the prybar into the gap and pull it with just your arm strength to loosen it from the wall. Avoid using a hammer or mallet unless absolutely necessary. If you do need to use force, do so cautiously to avoid damaging the wall.
6. Unscrew the Countertop
Then go underneath the counters and find the screws. Use either a screwdriver or an electric drill to remove the screws.
Keep one screw on each side of the counters until you remove all the other screws. This will help keep it in place and make taking the screws out easier.
When you do remove the final screws, have someone hold the counter in place so it doesn’t accidentally fall or injure you.
7. Break the Adhesive Bond
Most countertop installations will use construction adhesive to help keep the counters in place. While this will degrade over time, you may still need to cut or hammer the countertops loose.
With at least one person on each side, try to lift up the counters to see where it is still connected. Use the prybar and the mallet to break the bond and free the counters.
Repeat this step with any areas where the counters are stuck to the sub-top or cabinet material.
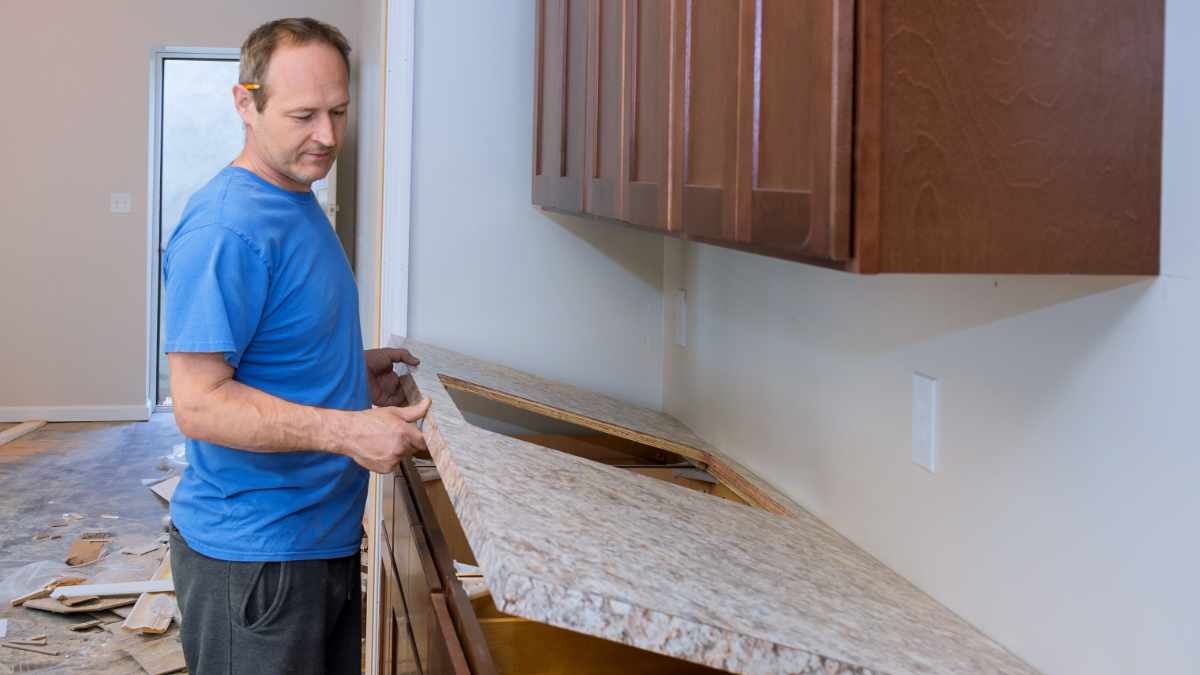
8. Remove the Countertop
Now that the counters are free, you can safely remove them. Carefully lift them up and away from the cabinets.
While they are heavy, most stone and marble countertops come in sections. This makes it easier to lift them out.
If you are throwing them away, carry them outside. If you are reusing or repurposing them in some way, keep them in a safe space until you need them again.
9. Inspect or Remove the Counter Sub-Top
With the counters out of the way, inspect the counter sub-top. This is usually a plywood or pinewood structure that covers all or part of the cabinets.
If you are keeping the cabinets, check the sub-top for rot or damage and replace damaged sections. If you are replacing the cabinets, you can skip this step altogether.