How To Close Up a Wall Opening
Whether you are remodeling or building a new home, closing up a wall opening is an important step in the process. Having the right tools and materials on hand can make the job easier and better ensure a good outcome. In this article, we will discuss how to properly close up a wall opening with detailed steps that provide tips and best practices. We’ll also cover what types of materials are best for this job.
How Do You Close Up a Wall Opening?
Strictly speaking, closing up an opening in the wall is a very easy process. Effectively, you cover the opening with a new piece of drywall, then spackle and sand the seam and paint the wall.
However, the exact process will depend on the type of opening and whether it is an interior or exterior opening. For example, closing up an interior doorway is much easier than closing an old window opening.
How To Close Up an Interior Wall Opening
Follow these steps if you are closing off an interior doorway or adding a new wall to an interior space.
- Demolition: Remove the existing trim, door jamb, door frame, or other materials in the way. Then cut back the drywall to expose at least one wall stud on either side of the wall space you want to close up. You will need to do this on both sides of the wall unless you are completely closing off that area of your home. If you plan to reuse the existing trim, make sure you remove it carefully.
- Framing: With the wall opening clear, add new framing to make attaching drywall easier. If you are closing up a doorway, you may not need to add any framing. Whereas you will need to install all new wall studs if you are adding an entirely new wall. Attach the footer stud to the floor with both construction adhesive and screws. Do the same with a new header stud along the ceiling. Then install the wall studs every 16 inches.
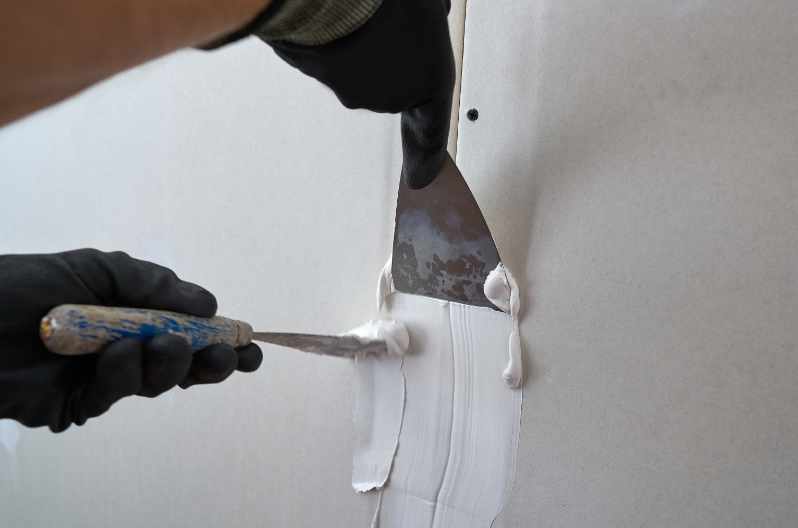
- Hang Drywall: Next, cut a new sheet of drywall to fill the wall opening and screw it into the wall studs. You may need more than one sheet of drywall for larger openings. Cover the drywall seams with a thin layer of mud or joint compound, then apply paper drywall tape. Let that dry before applying another layer of joint compound to the wall seam and the screw holes. Sand the compound once dry and repeat until completely smooth.
- Prime and Paint the Wall: With the drywall installed, paint the wall with at least two coats of high-quality interior primer. Then apply one to two coats of top coat paint. You can either paint the entire wall or feather the next section into the existing wall area.
- Install Trim: Once the new wall is painted, install new trim or baseboards. In some cases, you will need to install an entirely new piece of trim along that wall. In some cases, you can cut a piece of trim that matches the existing wall area.
How To Close Up an Exterior Wall Opening Like a Window or Door
While very similar to closing an interior wall opening, closing an exterior wall opening is more complicated. Not only do you need to add insulation, but you also need to repair the siding or cover the exterior hole in some way. Unless you are an experienced DIYer, you should hire a contractor to repair exterior wall openings.
- Demolition: Closing an exterior wall opening starts off mostly the same with removing existing trim and other materials in the way. Cut back drywall on the inside of your house, exposing at least one wall stud on either side of the opening. If you are closing up a window or door, remove those materials completely. Also, remove the siding material around the opening to make closing it up easier. Be careful when removing trim or siding materials so you can reuse them later.
- Framing and Insulation: As with the interior process, you need to install a wall frame to close the opening. Add a new header and footer stud, then screw in wall studs every 16 inches. Once the frame is in, go outside and measure the opening. Cut a piece of marine-grade plywood to match the hole and screw it into the wall studs. Seal the exterior gap with expanding foam sealant. Once the sealant is dry, cut or sand it down so it is mostly flush with the plywood. Once the wall is framed in, add insulation from the inside of your home.
- Finish the Wall Interior: Once the insulation is in, you can finish the interior of the wall the same way as outlined above. Hang new drywall and seal the seams with joint compound. Then sand the wall until it is smooth and apply two coats of primer and one to two coats of top coat paint. Then install the finishing trim.
- Finish the Exterior Wall: Lastly, you need to seal the exterior wall. The exact process will vary depending on the style and material of your home. In most cases, this involves reinstalling the siding. However, you may choose to install a different exterior finish here. If you are covering the area with existing siding, try to match the materials and colors for a seamless finish.